Step 1. Install Virtual Box
- apt-get install virtualbox
Step 2. Run Create new Virtual machine.
-
Run Virtual box.
-
Click New.
-
Press Next.
-
Fill Name, for example ‘WindowsXP’ and select OS type ‘Windows XP’ and click ‘Next’ button.
-
Set your memory. I have 1 GB memory, so I give 256MB for Windows XP. It’s basic need for Windows XP to run smoothly. Then click ‘Next’ button.
-
Click ‘New’ to create a new virtual hard disk or ‘Existing’ if you have a virtual hard disk already.
-
Click ‘Next’ button. There 2 types Image type. I recommend you to use ‘Fixed-size-image’. I’ve tried both images. Dynamically expanding image need less space at the beginning and flexible BUT it will reduce your Windows XP speed a lot even with a small application.
-
Click ‘Next’ button. If you use Windows XP for running few applications, I suggest to use 5 GB. If you use a lot of applications to run on XP, dual boot is better options.
-
Click ‘Next’ button.
-
And click ‘Finish’ button. Virtual box will create 5 GB virtual drive in your hard disk space.
-
Click ‘Next’ button to continue.
-
Finally, click ‘Finish’ button. The location of your virtual drive is at /home/your_username/.VirtualBox/VDI.
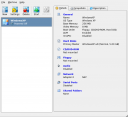
If you are success then you will get the same screen like me.
Step 3. Setting your Virtual drive.
Before we go to step no. 3, I suggest to create a new directory for your shared folder. In this sample I named ‘VirtualBox_Shareddirectory‘.
Now, we go to step no. . In this step, you will mount all your device to your virtual drive.
First, select your virtual drive and click ‘Settings‘.
-
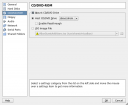
Choose CD/DVD ROM and mark ‘Mount CD/DVD drive‘ then select your CD/DVD drive. Don’t OK button yet.
-
Go to ‘Audio’ and click ‘Enable Audio’. Select your audio driver.
-
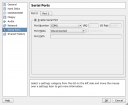
Goto to ‘Serial Ports‘ and click ‘Enable Serial Port’.
-
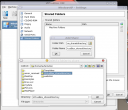
Goto to ‘Shared Folder‘. Click a folder icon (picture folder with green plus sign). Goto folder ‘VirtualBox_shareddirectory’ that we’ve created before. Click OK button to finish the process.
Now, we are ready to start the installation process for Windows XP.
Put the Windows XP CD installer into your CDROM. Cancel any messages from Windows XP installation disc.
To start the installation process, click ‘start‘.
Just follow all installation process until completely done.
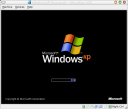
My windows XP in Gutsy + ZuneDesktopTheme.




No comments:
Post a Comment